How to Transfer Graphics with Mod Podge
Recently I’ve shared a couple projects where I’ve used Mod Podge to transfer graphics. I’ve gotten several emails asking questions about the process so I’ve created this tutorial in hopes of helping those that struggle with graphic transfers, much like I did until I found this method and tweaked it slightly. You could also Google “graphic transfers” and get other methods for accomplishing this fun task.
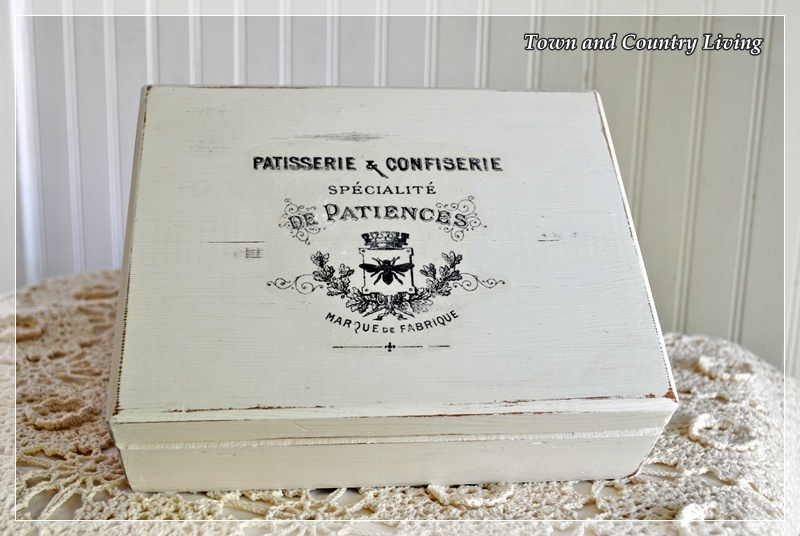
This simple box started out as a vessel for cigars. Cigar boxes are great for makeover projects.
I first painted the box in a custom mix of Old Ochre and Pure White Annie Sloan Chalk Paint.
I found the graphic at the ever popular Graphics Fairy. I inserted the graphic into a Word document.
I then flipped the graphic so it would print out in reverse. I used a laser printer.
After printing the graphic in reverse and after the paint dried,
I applied a thin coat of Mod Podge to the printed side.
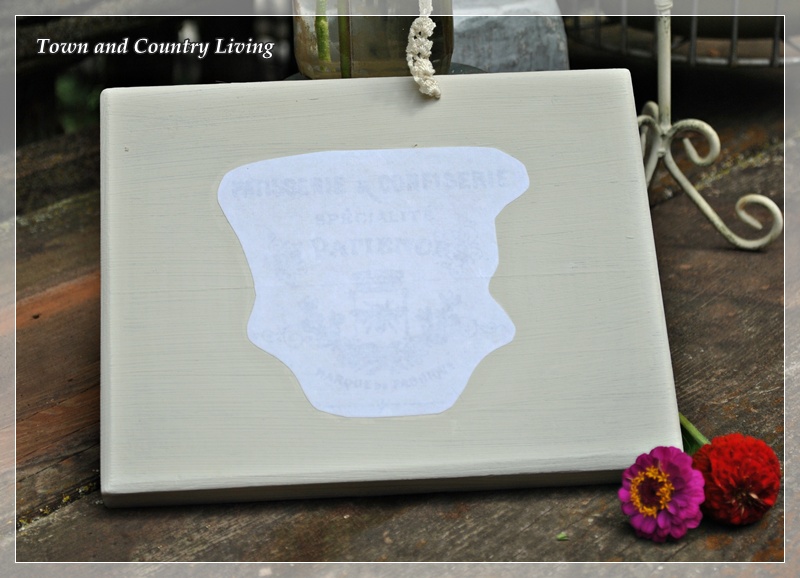
Then very carefully, I placed the printed side with the Mod Podge onto the center of the box lid.
I smoothed the air bubbles out of the paper, making sure not to move the graphic.
Some tutorials tell you to let the Mod Podge dry overnight. I find this isn’t necessary.
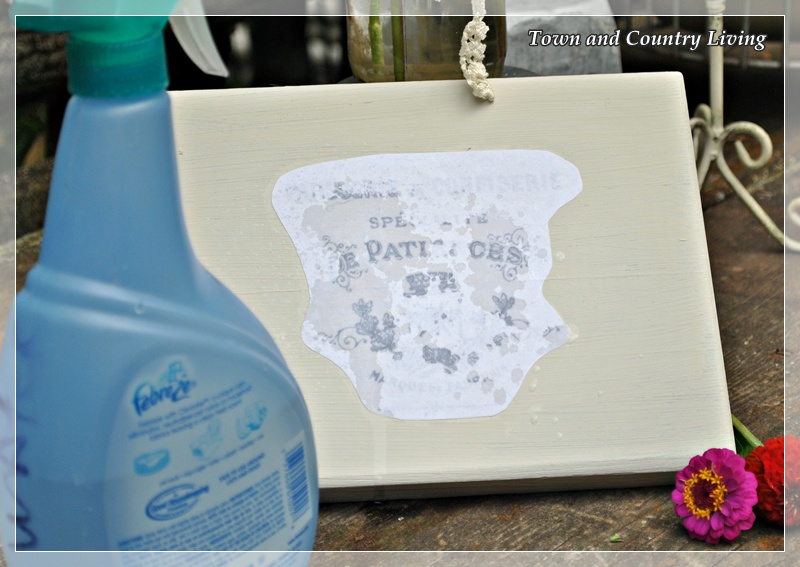
I let the image dry a couple hours and then misted it with water (which I keep in a Febreze bottle).
You can see the print showing through where I sprayed the water.

Spray all of the paper until damp but not sopping wet. Carefully wipe off excess water.
Once your graphic is wet all over, the fun yet nerve-wracking part begins.

With a gentle finger, rub the paper off, working lightly at first until you get a feel for the paper coming off.
You want to rub the paper off but leave the image behind. Rub too hard and you could remove the image.
If you’ve ever removed wallpaper, this process is somewhat similar.
You wet the wallpaper to loosen the glue’s grip, and then strip off the wallpaper.

You can see how the paper tends to roll off. If some of the paper dries while working, wet it again.
If some of the paper is stubborn and you’re afraid to rub harder, simply leave it and sand it off when done.

And here it is … with the paper removed. You can see the tiny rolls of paper at the bottom.
Lightly brush any pieces of paper off and then gently sand the stubborn parts.
If you use this process and it works for you (which it should) please let me know.
I’d love to see your project!!
If you use this process and it works for you (which it should) please let me know.
I’d love to see your project!!

I wanted a more aged appearance, so I sanded the top of the box and sanded part of the graphic, as well.
You could choose to leave it as is, without the sanding. I gave the entire box a coat of ASCP clear wax.
Waxing will protect the finish and the graphic, or apply a light coat of Mod Podge or other sealant.

I added script paper from Hobby Lobby and nature graphics from the Graphics Fairy to the interior.
I applied the script paper after cutting it to size and applying Mod Podge to the unprinted side.
Place the paper inside the box, rub out any air bubbles and let it dry.
Then cut out any other graphics, Mod Podge the unprinted side, and press in place.
I put this box up for sale in my brand new Etsy Shop and am happy to say, she’s already sold!
I want to thank Debra at Common Ground for her Marketplace Monday linky party.
You can link up your online store at the party every Monday.
I’m pretty sure the box sold because of the exposure my Etsy Shop received at Debra’s party.
If you’ve got an online store, be sure to link up at Common Ground every Monday.
And if you don’t have an online store … be sure to go shopping!

Wow. I had no idea how that was done. Amazing. I have to try this and get creative. I am not good at word (even though my resumes says I am ) so, flipping an image sounds intimidating, but I bet it’s easy than I think. Once I can flip I am all over this.
When you go to print it, on advanced options it should have “Mirror Image”. That’s all you need to do. Good luck!
Thank you for sharing your mod podge transfer information.. I have tried some transfer with this technique.. Enjoyed reading about your technique. Hugs, Cindy
Hey – thanks for this tutorial! I’ll try it. 🙂
-Revi
Thank you so much for the tutorial. You make it look so easy. Love your little box. Does this method work on color images, too? Congratulations on your Etsy shop. I’m so pleased for you. Danielle x
Jennifer, This is the best tutorial on transferring an image onto wood I have ever seen on the blogs! I can’t wait to put a fun transfer on my kitchen stools!
Thanks so much for sharing your wonderful tutorial on TUTORIALS TIPS AND TIDBITS!
great tutorial, Jennifer, and thanks so much for the shout out!!!
Jennifer: Yo también he utilizado muchas veces el Mod Podge para hacer transferencias. La verdad es que lo prefiero a cualquier otro método. Tú has conseguido un excelente resultado y la caja es muy bonita. ¡Felicidades!
Cariños, Blanca.
Pinning this tut with my others. I never know what one I might need to reference.
~Bliss~
Thanks for the great tutorial!!
Jennifer,
Thank you for sharing this technique.Your finished box is so pretty!
xx
Anne
Oh…how pretty!! Thanks for the great tutorial.
Blessings,
Linda
Great tutorial. I have not tried this before but can already think of a few good uses.
Oh i love it, and I did that same transfer on a side table in my living room. I get many compliments on it, and thanks for sharing yours.
What a beautiful box, it’s no wonder it sold already in your new Etsy shop. Congratulations! Thanks for the great tutorial, I really need to try this.
Your box turned out great! I love using mod podge to transfer graphics.
Wow! That looks fantastic! Thanks for sharing the how-to!!!
I do this transfer method all the time and always have good luck with it. Your box came out great! I love the inside!
Susan
homeroad.net
that is the cutest box, jennifer! congrats on your shop!
That looks fantastic – what a great idea. I’m going to give that a go!
♥
Melissah from Country Style chic
so cute! and the script paper on the inside brings the whole piece together. good choice!
Jennifer @ Decorated Chaos
http://decoratedchaos.blogspot.com
I have never done it this way but now can’t wait to try. I hope it works for me. I will probably mess up the design by rubbing too hard! I would love for you to share this or that adorable Honey sign at my link party, Gettin’ Krafty With It!
http://kraftykat76.blogspot.com/2012/07/gettin-krafty-with-it_30.html
Thanks for the wonderful tutorial.Can’t wait to try it.
Blessings from Ontario, Canada.
Bernice
Thanks for your tutorial! I have tried this with PVA craft glue and it just doesn’t work – will have to source some mod podge and give it a proper go as the end effect is awesome.
This is so pretty. Thank you for sharing your technique.
Hi Jennifer,My daughter’s blog LookbookUnlimited is began broadcasting…I hope, you do support her:)))Have a nice day:))
Hi Jennifer,again me:)I’m thank you so much:))You got me very happy:))
This sounds like a great project … I am going to try this for sure 🙂
I would love to have you join my monthly swap party…it is up and running. I would be thrilled if you joined:)
Francine
Hi Jennifer, Thanks for sharing this technique at the Open House party. I haven’t tried this yet but yours looks so good I am adding it to my project list.
Great project Jennifer. I hope to try it soon.
Wow, I’m so going to try this! I’ve never seen this technique before, but it sounds surprisingly easy. Thanks so much for sharing, Jennifer!
Your box transfer is perfect, and I love the inside, too!
This is one of the prettiest things I have seen in a while. Love the interior too. I have an old silverware box I have been wondering what to do with. Thanks for the instructions.
The box is to die for no wonder it’s sold:)Thank you so much for the tutorial.
Happy Brag Monday.
XO Marie
What a great tutorial – thanks for sharing! I have a cigar box right in front of me that would make the perfect candidate for this project!
Great job, Jennifer! I just did a bread board recently using this method. I was thrilled with the outcome, but will sand a few spots now and then it will be perfect. I was wondering about using the ASCP clear wax on it and I’m so glad you mentioned that. I was afraid it might remove the image.
Hi Jennifer,
Thank you so much for taking the time to share this tutorial! It is the easiest to understand I’ve found! Now I finally feel confident enough to use graphics myself!
Barbe
This box looks great! Will images printed on ink jet printers work too?
Thanks so much. I am going to try this next week!
Thank you so much, Jennifer, for sharing your transfer technique with us. I want to give this a try!
Great tutorial Jennifer and your little cigar box looks so sweet.
Thanks for linking up at Shabbilicious Friday.
Thank you for the great tutorial! Gonna pin it to my diy board. The box is awesome. Easy to see why it sold so quickly!
Excellent tutorial and such a pretty box. Congratulations on your Etsy shop. I just opened mine–Once Upon a Firefly–this week, too. I added your shop as a favorite and added you to my circle.
FINALLY a graphics transfer I can do! Thank you so much!!!! You are a Rock Star.
xoxo,
Kim
That is a gorgeous box and a great tutorial.
What a great project! I love Mod Podge. Hey….can you e-mail me if you get a second? I have an invitation for you 🙂
blessings,
karianne
you make the most gorgeous projects! tfs!
Interesting, thank you for posting.
Popped in from Wow Us Wednesday ~
thriftshopcommando.blogspot.com
Such a cute piece, Jennifer. Well done.
The box is lovely Jennifer! I pinned this post to come back to! I already knew the method but I always forget to use it and you made such a nice easy to follow tutorial!
Featured today at Shabbilicious Friday 🙂
Love how the box turned out! I so want to try doing the images at Graphic Fairy, but we only have an all-in-one deskjet printer and every tutorial calls for toner or inkjet. One day…
Debbie 🙂
Fabulous job! Thanks so much for the very helpful and detailed tutorial.
This is a great tutorial and I love the designs you used. The interior of the box was something special that I hadn’t thought about doing. It looks great. Can’t wait to try this out! Thanks for sharing!
Ohh brilliant !! I am having a go at this right now but using a DIY Mod Podge but I have ordered some off eBay fingers crossed it works I’m only doing it on a test piece for the moment what a fab idea.
Thank you for sharing
Jilly
Just doing this on a mirror going to leave for as long as poss before I *rub* off so hope it works ok I do have several trusty Sharpies at hand ! Thanks again
Jilly
This is a great tutorial and your cigar box is beautiful! I have a question? Do you have to use a laser printer? Thank you so much.
Blessings,
Susie
I don’t know if it will work with another type of printer as I haven’t tried it with another type. Maybe try it on a practice piece and see what happens.
Great project! Are you using regular old mod podge? Or a mod lodge transfer medium I’ve also read about? Thanks!
Jan, I used regular old Mod Podge. 🙂
When I tried this, I put my copy on a painted green, (acrylics) canvas. When I removed the paper backing, the area behind my lettering remained white and I thought it would look green like my painted canvas. I am not sure why. I thought it would transfer only, the black letters. How do I avoid this? Thanks! Chris
Try to trim as much of the white paper from the lettering as possible the next time you try a graphic transfer. If you haven’t covered the transferred graphic with a sealer, you can re-wet it and gently rub the white areas. I’ve had to do this myself on occasion and it works pretty well. Just be careful not to rub too hard as you don’t want to rub off any paint. Hope this helps!
I just found you! I have subscribed so that I can enjoy more of your posts, especially if they are all this thorough. Thanks so much for the detailed comprehensive directions. Every single word meant something and you took the intimidation out of the adventure! Thank you.
Can I transfer a graphic onto something that I have already Mod Podged paper onto? Or will that just make the original surface too wet? What if I use a sealer and then transfer over that?
Thanks for your help
With chalk paint, do you ever have a problem with it rubbing off when you apply the water and rub off the paper. Also, should we only use a laser printer or can you use a inkjet as well? I want to give this a try but don’t want to ruin my piece. Thank you for a wonderful tutorial!!
I so want to try doing the images at Graphic Fairy, but we only have an all-in-one deskjet printer and every tutorial calls for toner or inkjet.
I love this!! I have a question.., I tried transferring wheat ( from clip art) onto a pallet. I’m finding all the paper in between the ink sticks. Does the background have to blend with the paper? How do I just get the ink only? Thanks
ROOKIE MISTAKE!! I am a photographer and love the cute Mr & Mrs wood signs for pics. Instead of stenciling I decided to do what you did here. Like an idiot I put Annie Sloan clear wax over my ASCP BEFORE APPLYING THE GRAPHIC! I can’t believe I did that but it is testimony that the wax really does protect the surface. Take 2 tonight!!
If I have already transferred the ink to my piece of wood and brushed lodge podge over top can I go back and add something else over the modge podge? I transferred a picture and forgot I wanted to add a quote to the bottom. Do you think it will still work?
Hi Jennifer
I’m new at this craft, I used the Mod Podge transfer image product, covered the image to be transferred with a heavy coat, turned it and place it on a stone surface, left it overnight. The first layer of paper came off, but the rest remains, have wet and rubbed it several times with no success. I’m afraid to rub it to hard, as I don’t want the ink portion of the transfer to rub off. Could it be that the paper was to heavy? Did I put to much mod podge transfer medium on the paper?
Also in your tutorial you stated that you simply used the Original Mod Podge and that you layered it thinly!
I’m very anxious to be successful at this, but obviously need HELP!
Thanks for listening, any tips would be greatly appreciated!
I had the same results. Image stayed but so did a lot of white Ending up scraping it off. Will try again with original satin mod posted. Sounds like the original is clear versus the photo transfer one drying white.
I used satin mod podge, it wouldn’t dissolve at all and left even more paper, and the image smeared all over when I tried to rub it off. Total waste of time and supplies 🙁
I tried your method and it worked better than anything else I have tried. The first time I think I started to rub it off too soon. I waited a little longer for the second one and it worked just fine. Thanks for sharing! I have pinned this to my Pinterst board for future reference.
I have recently tiried this and wasn’t happy with my results. Have been searching for somewhere to ask questions. Maybe you can help me out.
Once I rubbed the paper off, the white was still left behind the image? I used a yellow background. Do I have to use white? I tried sanding, but couldn’t get through the layers of glue. Maybe I used too much glue? I would love to use this method, but am afraid of messing up another piece. Thanks for any suggestions.
Samantha
Hi Samantha. Yes, bits of paper could remain. When this happens, I spray a little more water onto the paper and gently rub after it sits for a bit (but before the water dries). Sometimes paint can rub off in addition to the paper. This adds to the time-worn look of the piece, but if you don’t like that some of the paint comes off, you can always touch up the paint with a small artist’s paint brush.
Hi!! Does this same process work with ink jet printers? Also Is mod podge the same as decoupage? I have CraftMedley Decoupage & Collage Glue/Sealer in Matte and have a bottle of the same stuff in Glossy. Would that work too you think?
Hi Dana. I don’t know if the process works with ink jet printers – I’ve never tried it. I’ve always heard to use a laser printer. Mod Podge is a type of glue and is used for decoupaging. I’m not sure if your glue would work since it has a sealer. You can always try a test with it though. It might work – I just can’t say for sure. 🙂
I can’t find any replies to the questions regarding which type of printer to use for this project i.e Inkjet or Lazer?
I tried this after finding using regular glue was a bit of a mess. Boy was I impressed your tips worked beautifully. I removed one side hours after completing and then the rest after 24 hours, much prefer the few hours wait over the 24 hr as it was much harder to remove the paper Still turned out fantastic and I will always use the Mod Podge over the glue now as the finish is so much cleaner and neater. I tried to post a picture of my beautiful rooster box but was unable to
Thanks again for the great advise
Do you have to use the Modge Podge Transfer or does any variety of Modge Podge work?
I tried this with a word graphic and a film from where I glued the image remained on the wood and I didn’t think it had a very clean finished appearance. Do i keep scrubbing until that film is gone as well?